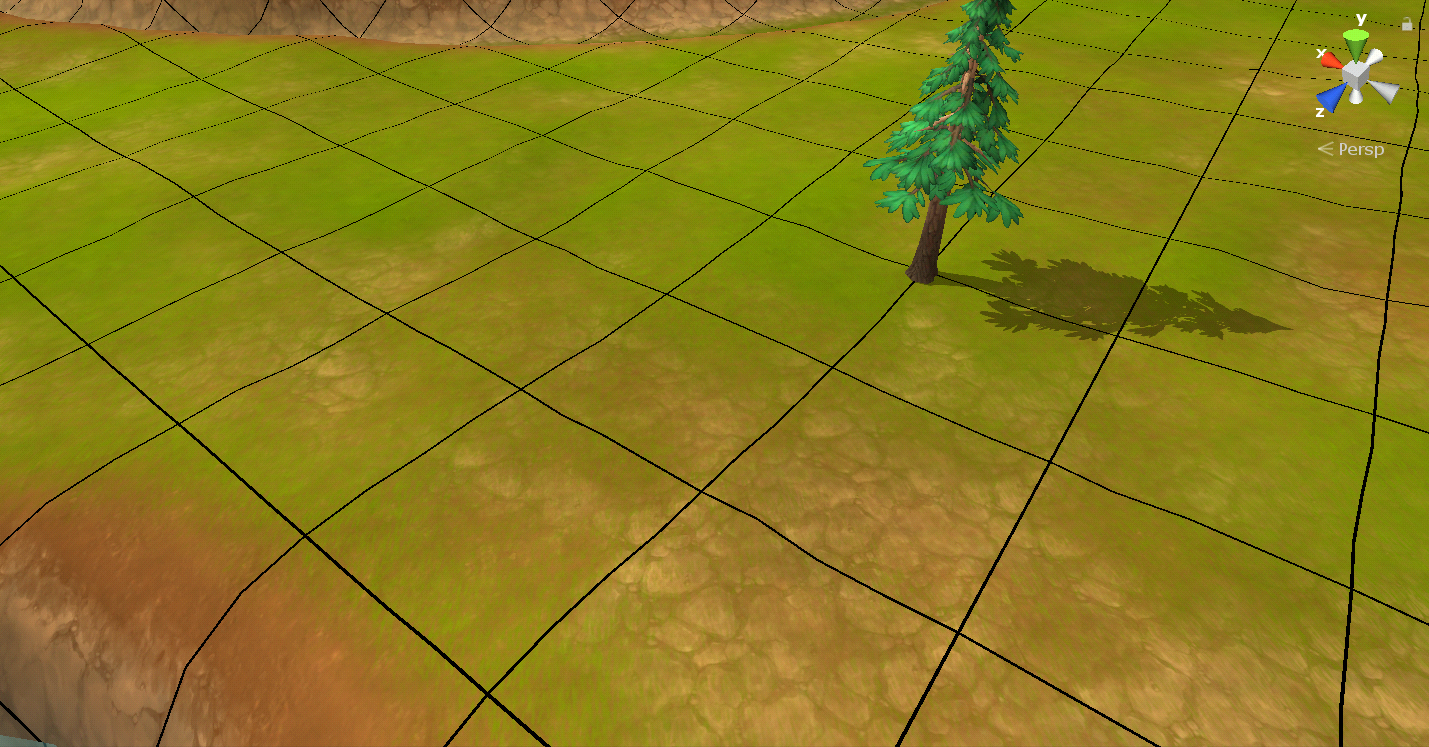
A lot of games these days are offering huge game worlds for the players to explore. Besides beautifully textured buildings, plants and creatures that inhabit your world, it is often the ground that will fill up most of the space of your scene. So, getting the visuals and performance right is important and a bit more complex than one might initially expect.
This article is about a Terrain Shader we developed at InnoGames for one of our upcoming Unity projects. It will describe the concepts of Texture Splatting and our blending technique. This shader supports up to 5 different materials in a single mobile friendly draw call.
Why not simply use Textures?
A naive approach of texturing the Terrain would be to treat it like another asset in your scene. You create a mesh and simply put a texture on it. Let one artist draw a lot of beautiful grass and tiny rocks by hand and the world will look amazing! Well in theory this would indeed result in astonishing visuals, in most cases this will result in a performance and workload nightmare.
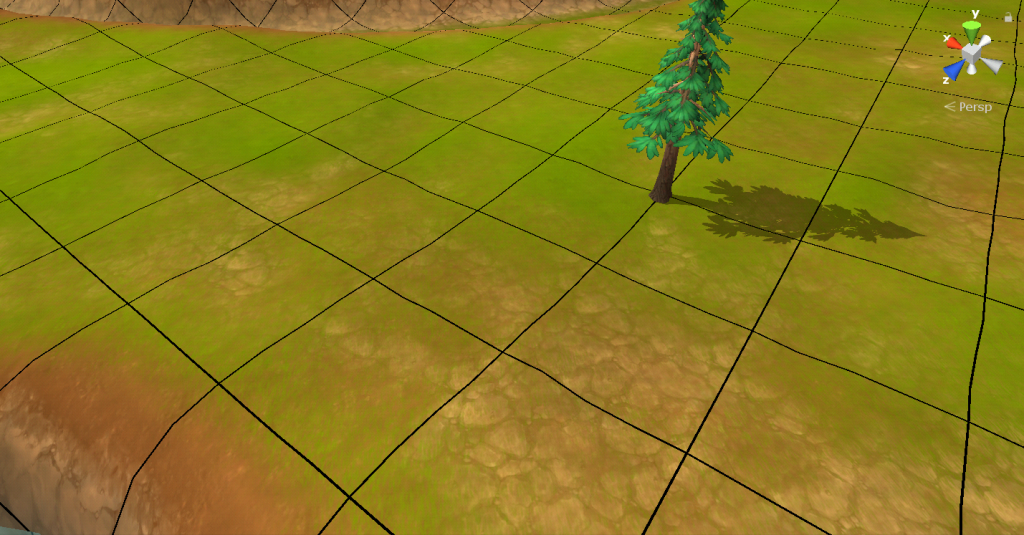
In this example scene every grid cell consists of a texture of 256 * 256 pixels. There are about 12 * 12 cells visible on the screen right now. If you’d wanted a texture for this, the floor in this scene alone would require a texture of 3072 * 3072 pixels minimum. This obviously does not scale.
Texture Splatting:
A common solution to tackle this problem is Texture Splatting. With this technique a so called splatmap texture is provided to the shader. This texture is not rendered directly, but is used as an information source instead, to specify where on the terrain, what material is supposed to be drawn. Those material textures are provided to the shader separately.
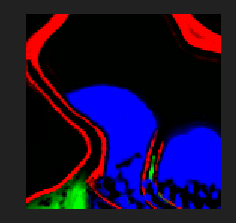

The resolution of the splatmap is defined by the size of the terrain and the required amount of detail depending on your game. In the example picture we use 2 pixels per meter of terrain.
Depending on chosen texture format, the splatmap can make use of all the four color channels Red, Green, Blue, and Alpha. Every channel in in a texture holds a floating point value ranging between 0.0 and 1.0 for every pixel. We will assign one material to each channel of our splatmap (for example Dirt = Red channel, Stone = Green channel, Sand = Blue channel, Soil = Alpha channel). The percentage of material on a pixel is mapped to a range between 0.0 and 1.0 and written in its corresponding color channel.
(For example a pixel containing 50% stone and 50% sand would correspond to a pixel value of RGBA (0, 0.5, 0.5, 0))
This usually allows us to have 4 different terrain materials, however a fifth one can be implied serving as the base material where no other materials are set (1 – (R+G+B+A))
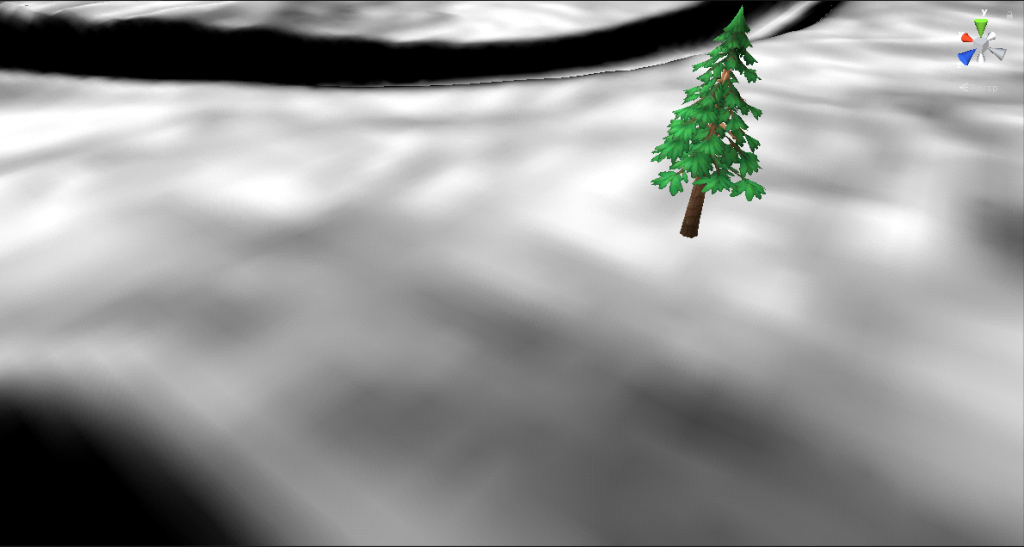
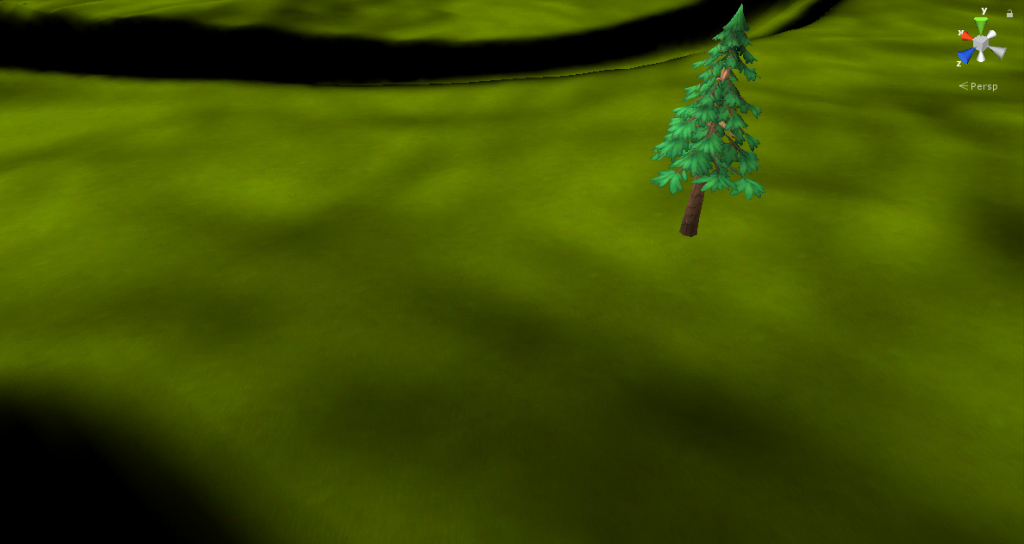
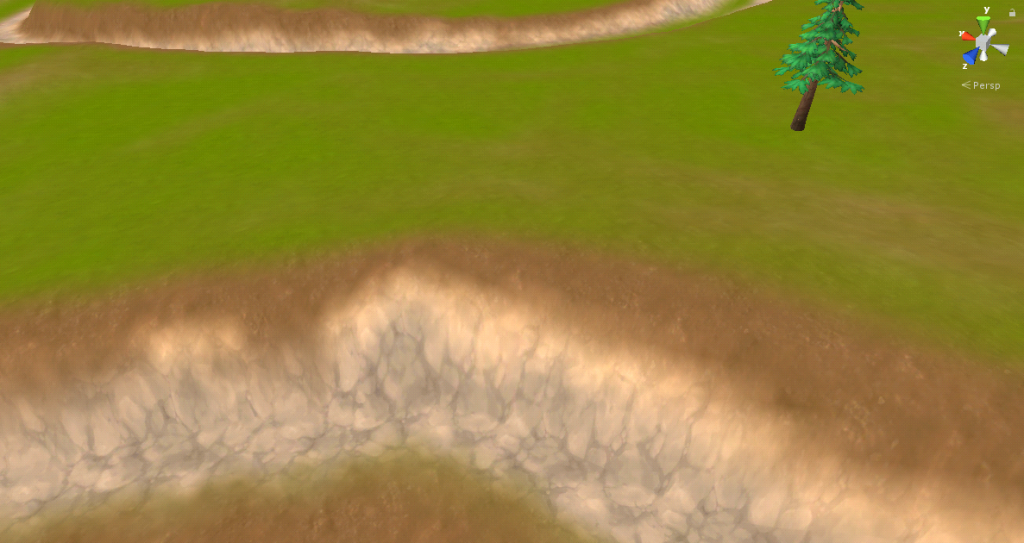
It starts taking shape! All the materials are where they are supposed to be, but the blending between different materials still looks unnatural. We want to see individual grass straws sticking out of the dirt, and sand crawling its way into the rifts between stone blocks.
Masked Blending:
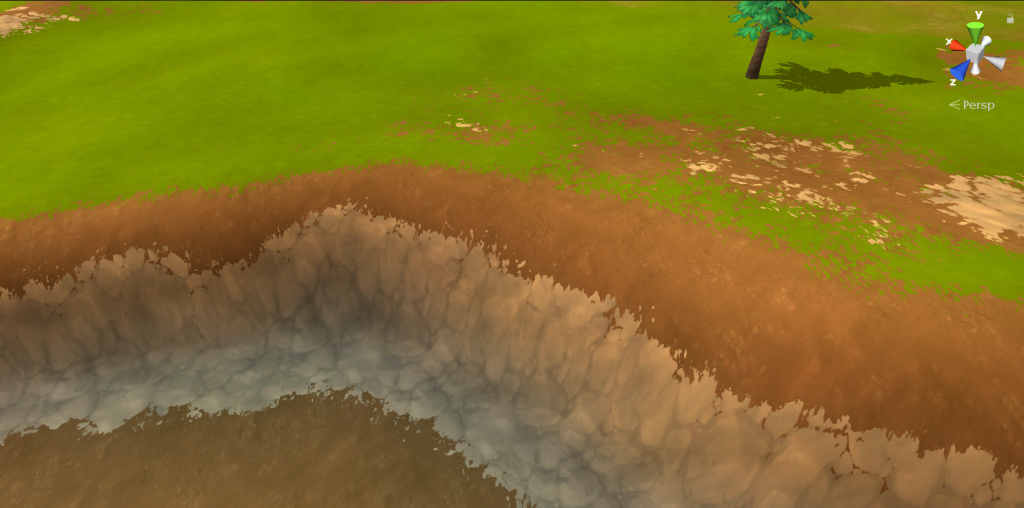
To achieve this effect, we need to provide some depth information to our material textures. Luckily we do not use transparent parts on our terrain, so we can simply use the alpha channel of every material texture to define a height for every pixel. This height information is then multiplied with its corresponding splatmap channel. When comparing all the material heights on a given point we pick the material with the highest value.


Masked Depth Blend:
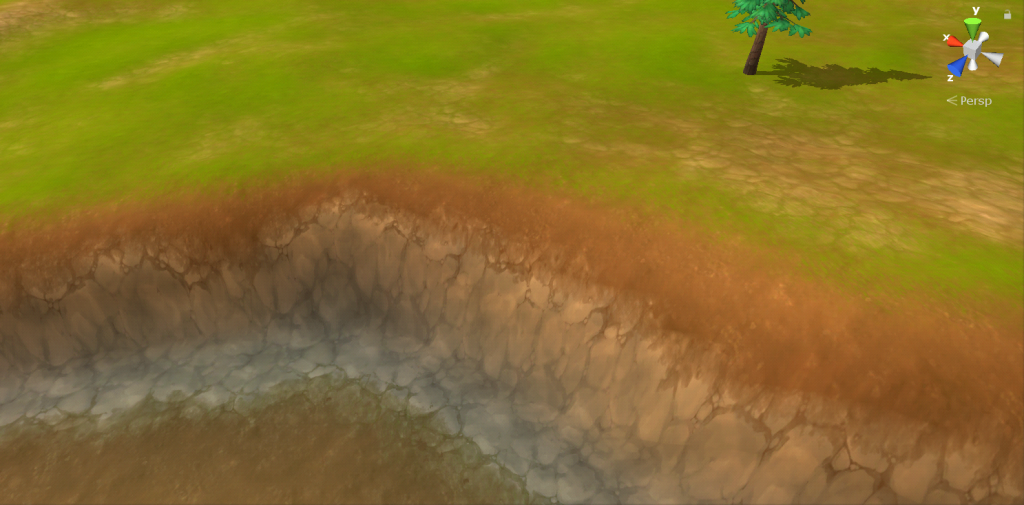
We will introduce another Float property to the shader called “Depth”. This property will define the depth of the material sampling. We take the highest material value on a position and subtract our Depth value. This is the new threshold height for each material. If we now take every material height and subtract the threshold, we can use the remainders to blend those materials.

Vertex Colors:
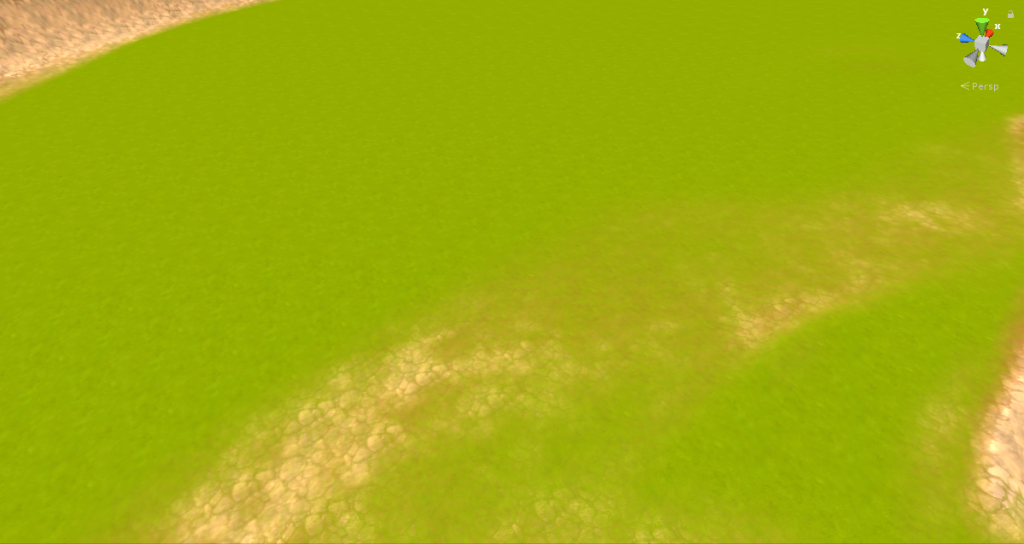
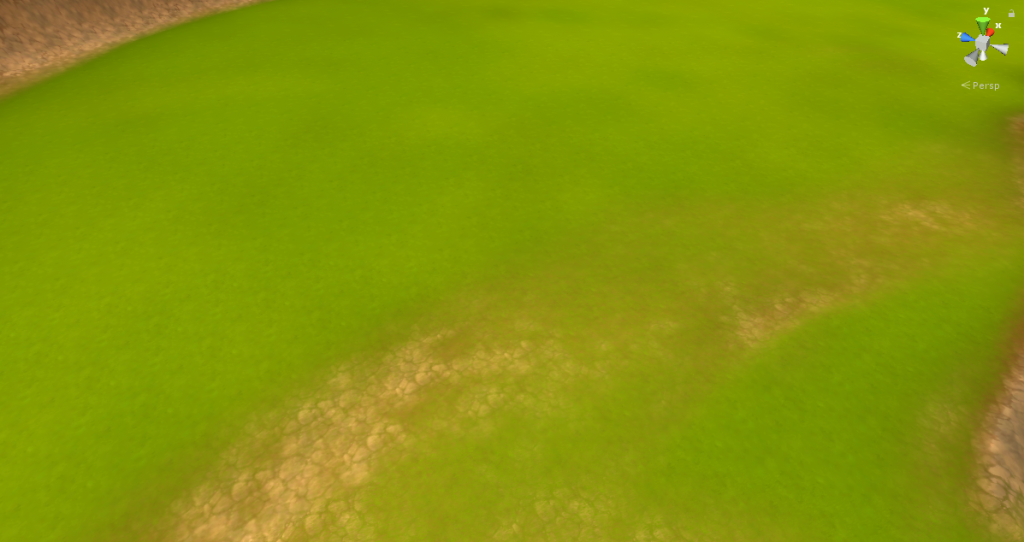
Now that the blending between materials is right, we want to add one more layer of color variation. This helps us to break up the repetitiveness of bigger areas of the same material. For example a bigger area of grass could look much more natural if there are some areas of browner or darker grass. For this we are going to utilize the vertex colors of our mesh. We are simply going to multiply this channel with our terrain color. This has the bonus that fake shadows or fake ambient occlusion could be applied to your terrain via this method.
Adjusting the Renderqueue:
Because this shader uses a lot of texture reads per pixel drawn on the screen, it makes sense to use a higher render queue than all other opaque world geometry. This way we can make best use of the zbuffer to only draw pixels that are not occluded. We can do this because in our game the Terrain rarely occludes other geometry. If you wanna use this shader in other circumstances, like for example for a first person shooter, where mountains often block the players view, you might consider not to use this optimization.
Make sure Mipmaps are active:
A common mistake is to disable the mipmaps on your material textures. This will drastically reduce the performance of your draw call due to cache misses when rendering distant parts of your Terrain, so better make sure they are enabled!
Lighting:
The lighting in the provided shader below is taken from the unity documentation example shaders. In our project we are using a more adjusted lighting solution. Depending on the needs of your game, you might even consider disabling the shadow casting functionality of you terrain and save up some performance.
Attachments:
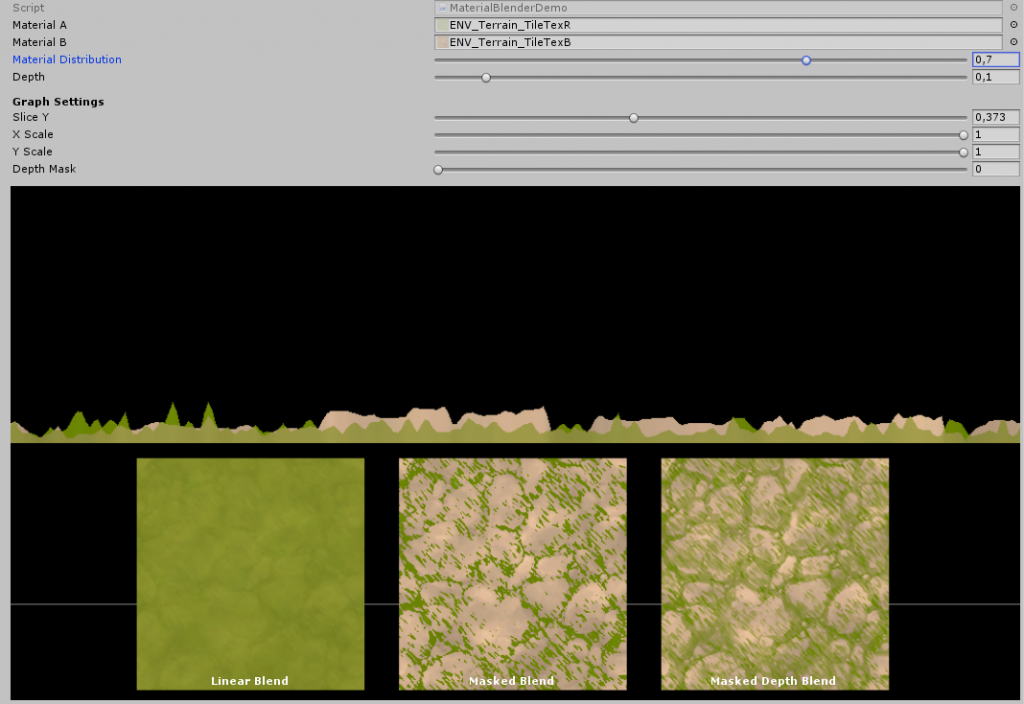
The provided unitypackage was created with Unity 2018.3.6f1 and contains this shader as well as a simple tool to help demonstrate the blending technique of this article. Its a simple Monobehaviour that can blend two material textures and visualize the result.
Material Distribution simulates the values of the splatmap where 0.7 means 70% texture A and 30% texture B.
Depth is the value as described in the section “Masked Depth blend”
Shader:
Shader "InnoGames/Terrain"
{
    Properties
    {
        _SplatMap("Splatmap (RGB)", 2D) = "black" {}
        _GroundTexture("Ground Texture", 2D) = "white" {}
        _TextureA("Texture A", 2D) = "white" {}
        _TextureB("Texture B", 2D) = "white" {}
        _TextureC("Texture C", 2D) = "white" {}
        _TextureD("Texture D", 2D) = "white" {}
        _TextureScale("TextureScale", Range(0.01,10)) = 0.25
        _PrioGround("Prio Ground", Range(0.01, 2.0)) = 1
        _PrioA("Prio A", Range(0.01, 2.0)) = 1
        _PrioB("Prio B", Range(0.01, 2.0)) = 1
        _PrioC("Prio C", Range(0.01, 2.0)) = 1
        _PrioD("Prio D", Range(0.01, 2.0)) = 1
        _Depth("Depth", Range(0.01,1.0)) = 0.2
    }

    SubShader
    {
        // Set Queue to AlphaTest+2 to render the terrain after all other solid geometry.
        // We do this because the terrain shader is expensive and this way we ensure most pixels
        // are already discarded before the fragment shader is executed:
        Tags{ "Queue" = "AlphaTest+2"}
        Pass
        {
            Tags{ "LightMode" = "ForwardBase" }
            CGPROGRAM
            #pragma vertex vert
            #pragma fragment frag
            // Make realtime shadows work
            #pragma multi_compile_fwdbase
            // Skip unnessesary shader variants
            #pragma skip_variants DIRLIGHTMAP_COMBINED LIGHTPROBE_SH POINT SPOT SHADOWS_DEPTH SHADOWS_CUBE VERTEXLIGHT_ON

            #include "UnityCG.cginc"
            #include "UnityLightingCommon.cginc"
            #include "AutoLight.cginc"

            sampler2D _SplatMap;
            sampler2D _GroundTexture;
            sampler2D _TextureA;
            sampler2D _TextureB;
            sampler2D _TextureC;
            sampler2D _TextureD;
            fixed _TextureScale;

            fixed _PrioGround;
            fixed _PrioA;
            fixed _PrioB;
            fixed _PrioC;
            fixed _PrioD;

            fixed _Depth;

            struct a2v
            {
                float4 vertex : POSITION;
                fixed3 normal : NORMAL;
                fixed4 color : COLOR;
                float3 uv : TEXCOORD0;
            };

            struct v2f
            {
                float4 pos : SV_POSITION;
                float2 uvSplat : TEXCOORD0;
                float2 uvMaterial : TEXCOORD1;
                fixed4 materialPrios : TEXCOORD2;
                // put shadows data into TEXCOORD3
                SHADOW_COORDS(3)
                fixed4 color : COLOR0;
                fixed3 diff : COLOR1;
                fixed3 ambient : COLOR2;
            };

            v2f vert(a2v v)
            {
                v2f OUT;
                OUT.pos = UnityObjectToClipPos(v.vertex);
                OUT.uvSplat = v.uv.xy;
                // uvs of the rendered materials are based on world position
                OUT.uvMaterial = mul(unity_ObjectToWorld, v.vertex).xz * _TextureScale;
                OUT.materialPrios = fixed4(_PrioA, _PrioB, _PrioC, _PrioD);
                OUT.color = v.color;

                // calculate light
                half3 worldNormal = UnityObjectToWorldNormal(v.normal);
                half nl = max(0, dot(worldNormal, _WorldSpaceLightPos0.xyz));
                OUT.diff = nl * _LightColor0.rgb;
                OUT.ambient = ShadeSH9(half4(worldNormal,1));

                // Transfer shadow coordinates:
                TRANSFER_SHADOW(OUT);

                return OUT;
            }

            fixed4 frag(v2f IN) : SV_Target
            {
                fixed4 groundColor = tex2D(_GroundTexture, IN.uvMaterial);
                fixed4 materialAColor = tex2D(_TextureA, IN.uvMaterial);
                fixed4 materialBColor = tex2D(_TextureB, IN.uvMaterial);
                fixed4 materialCColor = tex2D(_TextureC, IN.uvMaterial);
                fixed4 materialDColor = tex2D(_TextureD, IN.uvMaterial);

                // store heights for all materials on this pixel
                fixed groundHeight = groundColor.a;
                fixed4 materialHeights = fixed4(materialAColor.a, materialBColor.a, materialCColor.a, materialDColor.a);
                // avoid black artefacts by division by zero
                materialHeights = max(0.0001, materialHeights);

                // get material amounts from splatmap
                fixed4 materialAmounts = tex2D(_SplatMap, IN.uvSplat).argb;
                // the ground amount takes up all unused space
                fixed groundAmount = 1.0 - min(1.0, materialAmounts.r + materialAmounts.g + materialAmounts.b + materialAmounts.a);

                // calculate material strenghts
                fixed alphaGround = groundAmount * _PrioGround * groundHeight;
                fixed4 alphaMaterials = materialAmounts * IN.materialPrios * materialHeights;

                // find strongest point of all materials
                fixed max_01234 = max(alphaGround, alphaMaterials.r);
                max_01234 = max(max_01234, alphaMaterials.g);
                max_01234 = max(max_01234, alphaMaterials.b);
                max_01234 = max(max_01234, alphaMaterials.a);

                //lower threshold
                max_01234 = max(max_01234 - _Depth, 0);

                // mask all materials above threshold
                fixed b0 = max(alphaGround - max_01234, 0);
                fixed b1 = max(alphaMaterials.r - max_01234, 0);
                fixed b2 = max(alphaMaterials.g - max_01234, 0);
                fixed b3 = max(alphaMaterials.b - max_01234, 0);
                fixed b4 = max(alphaMaterials.a - max_01234, 0);

                // combine all materials and normalize
                fixed alphaSum = b0 + b1 + b2 + b3 + b4;
                fixed4 col = (
                    groundColor * b0 +
                    materialAColor * b1 +
                    materialBColor * b2 +
                    materialCColor * b3 +
                    materialDColor * b4
                ) / alphaSum;

                //include vertex colors
                col *= IN.color;

                // compute shadow attenuation (1.0 = fully lit, 0.0 = fully shadowed)
                fixed shadow = SHADOW_ATTENUATION(IN);
                // darken light's illumination with shadow, keep ambient intact
                fixed3 lighting = IN.diff * shadow + IN.ambient;

                col.rgb *= IN.diff * SHADOW_ATTENUATION(IN) + IN.ambient;

                return col;
            }
            ENDCG
        }

        // shadow casting support
        UsePass "Legacy Shaders/VertexLit/SHADOWCASTER"
    }
}

