Why unit tests
It’s often not an easy decision to make, to start using automated tests. Automated user tests click buttons in your game and show you the results immediately. The benefit of unit tests is not that obvious.
Why should you write tests for every method, when you can write an automated user test that tests several classes at once?
The answer is that the main goal of automated user tests is to verify the correct behaviour of your game. The main purpose for unit test is to reduce the time you need to find the malfunction line of code.
This period of time that you spend jumping through your code, is perfectly labeled by Robert C. Martin as “spelunking”. This frustrating time, where you spend hours or days to change a single line of code.
That’s the time unit-test aim to reduce.
Breeding the monster
Let’s say you have been convinced and start writing unit tests. You write your first test and it feels great.
But not long and you find yourself changing the tests more than your code and even worse you feel like the tests are starting to conspire against you. They start to fail in large groups. So you have to go spelunking again. To make matters even worse, your tests start to take more and more time to run.
In short: you created a monster. At some point you decide not to feed it any longer and now you are back at where you started. Or even worse, there is a bitter aftertaste about testing, and how useless it is.
What happened ?
Writing automated tests is already hard on its own. Writing tests inside a framework like Unity is even harder since a lot of API calls are not very test friendly. There are barely any interfaces used, most class are static or bound to a MonoBehaviour. All of this makes it very easy to feed the monster.
In the next sections you will learn step by step how to create unit tests that don’t feed the monster.
Inventory – an example
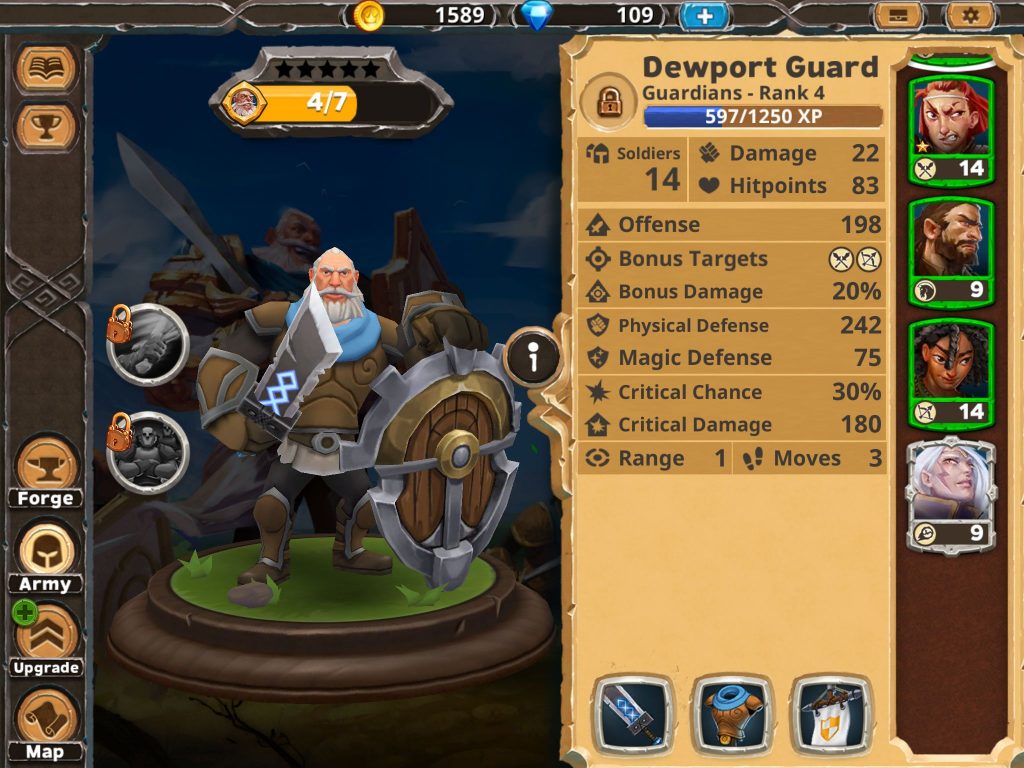
For this example you will code a simple inventory mechanism, like in the the game “Warlords of Aternum” shown above. If you click an item on the lower right corner, the 3D character on the left will get updated, and show the equipped item.
If you strip that down to the raw skeleton it will look like this:
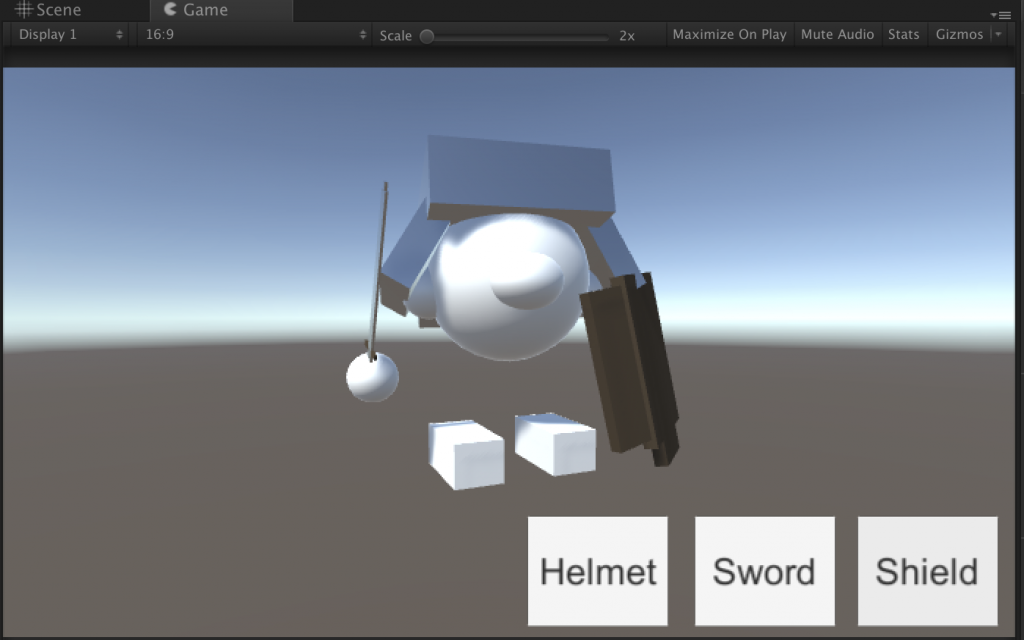
You can easily identify the two main elements that need to be implemented: the 3D character and the inventoryUI with the item buttons.
The naive implementation for the inventory UI could look like this:
public class InventoryUI : MonoBehaviour
{
   public event Action<ItemId> ItemAdded;

   // this is connected in the inspector to the SwordUIButton
   public void AddSword()
   {
      AddItem(ItemId.Sword);
   }

   // this is connected in the inspector to the ShieldUIButton
   public void AddShield()
   {
      AddItem(ItemId.Shield);
   }

   // this is connected in the inspector to the HelmetUIButton
   public void AddHelmet()
   {
      AddItem(ItemId.Helmet);
   }

   private void AddItem(ItemId id)
   {
      if (ItemAdded != null)
      {
         ItemAdded(id);
      }
   }
}
And the respective character implementation:
public class Character3d : MonoBehaviour
{
   public Transform ShieldAttachmentPoint;
   public Transform HelmetAttachmentPoint;
   public Transform SwordAttachmentPoint;

   public InventoryUI AttachedUi;

   private void Awake()
   {
      Init();
   }

   public void Init()
   {
      AttachedUi.ItemAdded += UpdateItemView;
   }

   private void UpdateItemView(ItemId itemId)
   {
      switch (itemId)
      {
         case ItemId.Helmet:
            InstantiateItem("Helmet", HelmetAttachmentPoint);
            break;
         case ItemId.Shield:
            InstantiateItem("Shield", ShieldAttachmentPoint);
            break;
         case ItemId.Sword:
            InstantiateItem("Sword", SwordAttachmentPoint);
            break;
      }
   }

   private void InstantiateItem(string itemId, Transform attachmentPoint)
   {
      // do not override an already atteched item
	  if (attachmentPoint.childCount > 0)
      {
         return;
      }

      var prefab = Resources.Load<GameObject>(itemId);
      var item = Instantiate(prefab);
      item.transform.SetParent(attachmentPoint);
      item.transform.localPosition = Vector3.zero;
      item.transform.localRotation = Quaternion.identity;
   }
}
A feature that you can test now is: that the 3D character should react to the published event by showing the corresponding item on screen.
Create the test setup
Unit tests in Unity run based on the NUnit Framework. They run in editor only, which means there is no concept of a render loop, or any forms of update, start or awake functions.
Since the tests are running in the editor, all your test scripts must be placed inside an “Editor” folder:
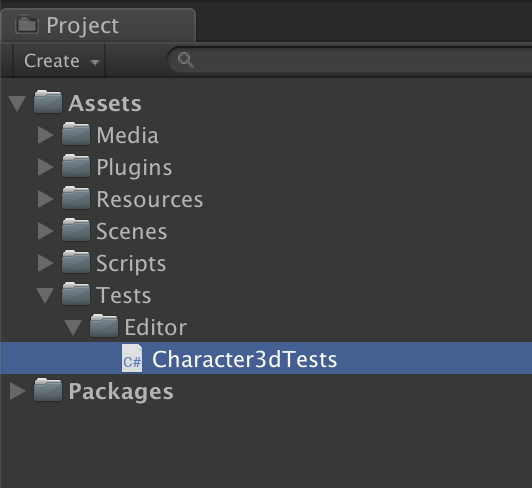
The recommended way to organise your tests is: one file per class and at least one test per function. Every function should only test one thing.
The empty test class should look like this:
using UnityEngine;
using NUnit.Framework;

public class Character3dTests  {


}
The first thing you need to do is setup your test environment. NUnit is working with attributes to mark functions with their purpose.
The SetUp attribute, for example, you mark a function to execute before every single test in this class.
using UnityEngine;
using NUnit.Framework;
public class Character3dTests  {

   private Character3d _testObject;
   [SetUp]
   public void RunBeforeEveryTest()
   {
       _testObject = new GameObject("TestCharacter").AddComponent<Character3d>();
   }
}
This will create a new GameObject before every test that you can use.
You also need to clean up when the test is finished to not pollute your active scene with test objects. That’s what the TearDown attribute is for:
[TearDown]
public void RunAfterEveryTest()
{
    Object.DestroyImmediate(_testObject.gameObject);
}
Now you are ready to write your first test. Your tested class has only one public entry point: The event published from InventoryUI.
Therefore, your tests should evaluate the behaviour associated with that event: showing the expected 3D item the event is fired.
For that you need an inventory you can test with:
using UnityEngine;
using NUnit.Framework;
public class Character3dTests  {

   private Character3d _testObject;
   private InventoryUI _testUI;
    [SetUp]
    public void RunBeforeEveryTest()
    {
        _testObject = new GameObject("TestCharacter").AddComponent<Character3d>();
       _testUI = new GameObject("InventoryUI").AddComponent<InventoryUI>();
       _testObject.AttachedUi = _testUI;
       _testObject.Init();
    }

   [TearDown]
   public void RunAfterEveryTest()
   {
       Object.DestroyImmediate(_testObject.gameObject);
      Object.DestroyImmediate(_testUI.gameObject);
   }
}
Now you can write your first test:
[Test]
public void AddHelmetButton_ShouldInstantiate_HelmetObject()
{
    Assert.Fail("");
}
The test needs to be marked with the “Test” attribute. The name of the test should state the tested function ( AddHelmet ) and the expected behaviour ( Should Instantiate the 3d Object )
The actual testing happens with the Assert keyword, which states the expected behaviour as a boolean expression and fails the test, if the statement is not true.
The test code shown will always fail due to the explicit fail statement.
When you start writing a new test, you should always start by making it fail. This makes it easy to see that the new test actually runs. Otherwise it could happen that you made a mistake during setup and the test is not running at all.
To run the test you need to open the Unity TestRunner window at: Window -> General -> TestRunner
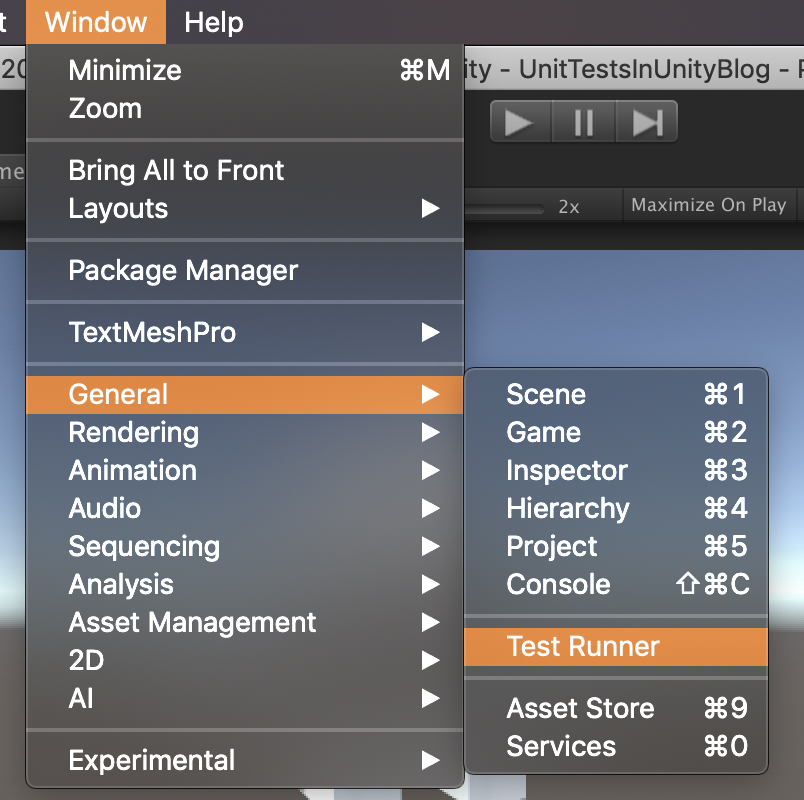
This will open the “Test Runner” Window as dockable window.
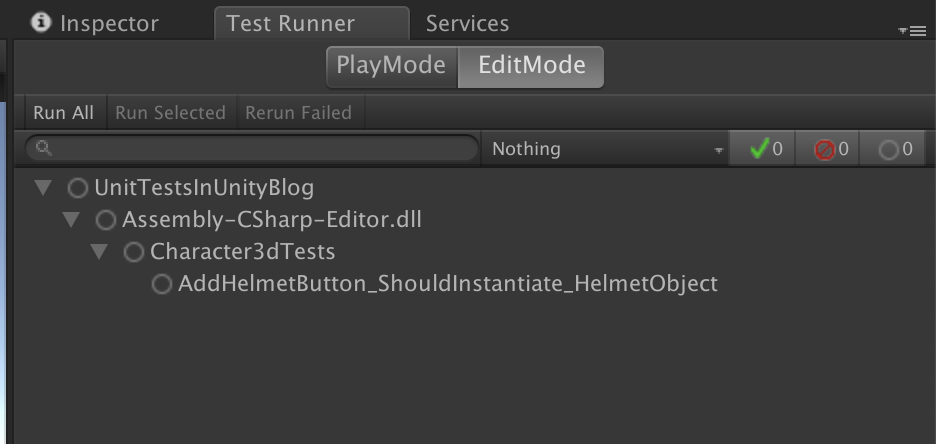
In the upper left corner of this window you can choose “Run All” to run the tests. If the setup is working, you should see a failing test. Here you can also see why the name of the test is important. It tells you on at a glance what functionality is not working as expected, reducing your search & debug time significantly.
Implement the first test
Now you can implement a full test:
[Test]
public void AddHelmetButton_ShouldInstantiate_HelmetObject()
{
   // Setup test specific objects
   _testObject.HelmetAttachmentPoint = _testObject.transform;

   // trigger function to test
   _testUI.AddHelmet();

   // evaluate result
   var firstChild = _testObject.HelmetAttachmentPoint.GetChild(0);
   Assert.IsTrue(firstChild.name.Contains("Helmet"));
}
Your first test should pass now, and should have checked that the helmet item got added.
This implementation and the corresponding test already have some common problems. These are the breading ground for our monster. And while it’s a monster puppy at the moment, it will soon grow. Fortunately, monsters smell even when they are small.

Code smell #1: Concrete dependencies
Take a look at your SetUp function
[SetUp]
public void RunBeforeEveryTest()
{
    _testObject = new GameObject("TestCharacter").AddComponent<Character3d>();
   _testUI = new GameObject("InventoryUI").AddComponent<InventoryUI>();
   _testObject.AttachedUi = _testUI;
   _testObject.Init();
}
You see that there are two objects created with different Components. This implies that any future change in the InventoryUI might also trigger changes on the Character3dTests. This leads to the (correct) feeling that you have to update our tests way too often.
It also implies that any issues inside the InventoryUI can potentially fail the Character3dTests. This goes against the goal of unit tests: they should guide you to a very tiny scope where errors originate from.
To avoid this issue, you should make use of the polymorphism and inverse the dependency by using interfaces.
With this in mind you should enhance the InventoryUI with an interface
public interface IInventoryUI
{
   event Action<ItemId> ItemAdded;
}
public class InventoryUI : MonoBehaviour, IInventoryUI
{
Accordingly you should update your Character3d script to expect the interface instead of the concrete implementation:
public class Character3d : MonoBehaviour
{
   public Transform ShieldAttachmentPoint;
   public Transform HelmetAttachmentPoint;
   public Transform SwordAttachmentPoint;
   public IInventoryUI AttachedUi;
After this change you are able to use a dummy inventory instead of the full implementation:
public class DummyInventory : IInventoryUI
{
   public event Action<ItemId> ItemAdded;
   public void Fire(ItemId id)
   {
      ItemAdded(id);
   }
}
You can now use this dummy inside your tests to eliminate the dependency to the real inventory implementation. The test will no longer fail if the InventoryUI has a bug. As an additional benefit, you do not need to change anything in your existing tests except for breaking API changes.
The updated test looks like this:
public class Character3dTests  {

   private Character3d _testObject;
   private DummyInventory _dummyInventory;
   [SetUp]
   public void RunBeforeEveryTest()
   {
       _testObject = new GameObject("TestCharacter").AddComponent<Character3d>();
      _dummyInventory = new DummyInventory();
      _testObject.AttachedUi = _dummyInventory;
      _testObject.Init();
   }

   [TearDown]
   public void RunAfterEveryTest()
   {
       Object.DestroyImmediate(_testObject.gameObject);
   }

   [Test]
   public void AddHelmetButton_ShouldInstantiate_HelmetObject()
   {
      // Setup test specific objects
      _testObject.HelmetAttachmentPoint = _testObject.transform;

      // trigger function to test
      _dummyInventory.Fire(ItemId.Helmet);

      // evaluate result
      var firstChild = _testObject.HelmetAttachmentPoint.GetChild(0);
      Assert.IsTrue(firstChild.name.Contains("Helmet"));
   }
}
Code smell #2: Implicit dependencies
After all this you still have a test that passes. But if you actually play your example, you will see a nullReference exception. This shows us one of the limitations of the Unity engine: the dependency from Character3d to the InventoryUI was modelled with a public member that was connected inside the Editor Inspector, as it is common in Unity.

As a result the Character3d class has an implicit dependency that is not easy to spot by just looking at the code.
To make matters worse, Unity does not support interfaces as serialised members, so the dependency went broken unnoticed.
To avoid this problem in the future you should make all dependencies explicit, and follow the dependency inversion principle.
Usually, this is done by requiring all dependencies as a constructer parameter.
But Unity does not support constructors for Components, so you need to work around this with a convention.
This convention can differ from project to project and depends on personal preferences and the used dependency framework ( like StrangeIOC or Zenject ). For now you can use an “Init” function on every MonoBehaviours for that:
public class Character3d : MonoBehaviour
{
   public Transform ShieldAttachmentPoint;
   public Transform HelmetAttachmentPoint;
   public Transform SwordAttachmentPoint;
   private IInventoryUI AttachedUi;
   public void Init(IInventoryUI inventoryUi)
   {
      AttachedUi = inventoryUi;
      AttachedUi.ItemAdded += UpdateItemView;
   }
For the sake of simplicity you can inject dependencies manually during this example.
You can write a Main class that starts your application.
using UnityEngine;
public class Main : MonoBehaviour {
   public Character3d ConnectedCharacter;
   public InventoryUI ConnectedInventory;

   // Use this for initialization
   void Start () {
      ConnectedCharacter.Init(ConnectedInventory);
   }
}
While this is just moving the dependency problem to another class ( now the Main class has implicit dependencies ), it keeps our actual game code clean from implicit dependencies and centralises the problem in one spot. This way it could be fixed in the Main class with a DI framework at a later point in time. Commonly, the Main class is then replaced by an installer and the Init naming convention with an attribute.
Code smell #3: Hidden dependencies
The little test game is running again and the test passes, but there is still some issues with the test and the code.
Take a look at your Character3d class :
private void InstantiateItem(string itemId, Transform attachmentPoint)
{
   if (attachmentPoint.childCount > 0)
   {
      return;
   }
   var prefab = Resources.Load<GameObject>(itemId);
   var item = Instantiate(prefab);
   item.transform.SetParent(attachmentPoint);
   item.transform.localPosition = Vector3.zero;
   item.transform.localRotation = Quaternion.identity;
}
There is a dependency to UnityEngine.Resources which is hidden deep inside your game logic and not very easy to spot. That means your test has yet another dependency that could cause it to fail, which is exactly what you want to avoid.
While it’s often safe to assume the that Resources class from Unity is a stable and not volatile ( meaning it’s unlikely to break and unlikely to change it’s API ), the test can still fail if the the resource you are trying to load is not there.
The bottom line is: You need to make the dependencies visible by explicitly requesting them, for example, in the Init function. This leads to a very typical problem with Unity: A lot of the APIs are available as a static function call, so there is no object that you can request. The only thing that you could request is the load function itself, but that doesn’t feel very object oriented and will require one injection per function you need.
Instead you can wrap the UnityAPI in your own object:
using UnityEngine;

public interface IResourceLoader
{
   T Load<T>(string resourcePath) where T : Object;
}

public class UnityResourceLoader : IResourceLoader
{
   public T Load<T>(string resourcePath) where T : Object
   {
      return Resources.Load<T>(resourcePath);
   }
}
Now you can use this object as required dependency:
public class Character3d : MonoBehaviour
{
   public Transform ShieldAttachmentPoint;
   public Transform HelmetAttachmentPoint;
   public Transform SwordAttachmentPoint;
   private IInventoryUI _attachedUi;
   private IResourceLoader _resourceLoader;
   public void Init(IInventoryUI inventoryUi, IResourceLoader resourceLoader)
   {
      _resourceLoader = resourceLoader;
      _attachedUi = inventoryUi;
      _attachedUi.ItemAdded += UpdateItemView;
   }
And then use the injected loader instead of the static one:
private void InstantiateItem(string itemId, Transform attachmentPoint)
{
   if (attachmentPoint.childCount > 0)
   {
      return;
   }
   var prefab = _resourceLoader.Load<GameObject>(itemId);
   var item = Instantiate(prefab);
   item.transform.SetParent(attachmentPoint);
   item.transform.localPosition = Vector3.zero;
   item.transform.localRotation = Quaternion.identity;
}
What’s left is to adjust your test:
First you need a dummy ResourceLoader, similar to what you did before with the dummy InventoryUI:
private class DummyResourceLoader : IResourceLoader
{
   public T Load<T>(string resourcePath) where T : Object
   {
      var item = new GameObject(string.Format("Dummy:{0}", resourcePath));
      return (item as T);
   }
}
Once you use the dummy ResourceLoader inside the test, you are independent from the actual files on disk.
[SetUp]
public void RunBeforeEveryTest()
{
    _testObject = new GameObject("TestCharacter").AddComponent<Character3d>();
   _dummyInventory = new DummyInventory();
   _dummyResourceLoader = new DummyResourceLoader();
   _testObject.Init(_dummyInventory, _dummyResourceLoader);
}
With these changes you now have only one reason for your test to fail: if and when the actual implementation of the tested function is incorrect.
Additional improvements
Right now the test ignores the fact that there is actually three different items to test. To fix this you could duplicate your helmet test, to also test the sword and the shield, but: duplicating code never feels right. Here is another way of doing this.
NUnit has an attribute called: TestCase which allows you provide parameters for your test-code:
[Test]
[TestCase(ItemId.Helmet)]
[TestCase(ItemId.Shield)]
[TestCase(ItemId.Sword)]
public void AddItemButton_ShouldInstantiate_Item(ItemId itemId)
{
   // Setup test specific objects
   _testObject.HelmetAttachmentPoint = _testObject.transform;
   _testObject.ShieldAttachmentPoint = _testObject.transform;
   _testObject.SwordAttachmentPoint = _testObject.transform;

   // trigger function to test
   _dummyInventory.Fire(itemId);

   // evaluate result
   var firstChild = _testObject.HelmetAttachmentPoint.GetChild(0);
   Assert.IsTrue(firstChild.name.Contains(itemId.ToString()));
}
Internally, this will create 3 tests.
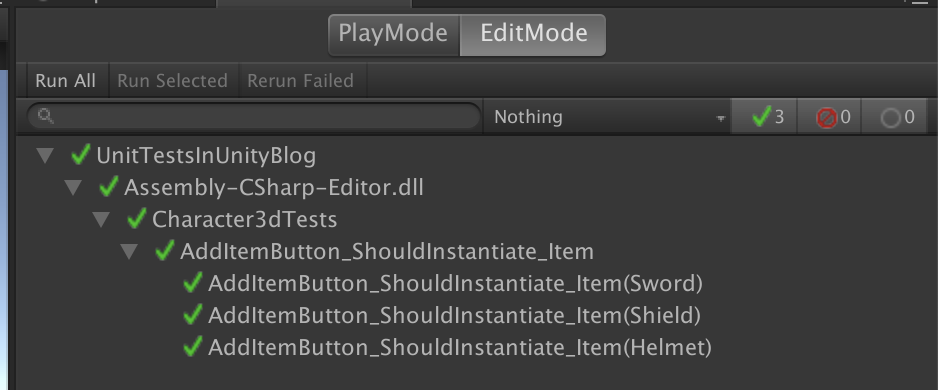
Source Code
You can find the complete example project for here: https://github.com/innogames/how-to-avoid-the-unit-test-monster
Conclusion
During this example implementation you added abstraction layers to hide the original static Unity APIs and worked around serialisation restrictions.
Those changes where necessary to make the implementation more testable and lead to a cleaner architecture for your game. The decision which technique to use for asset loading is abstracted away in an interface. It’s only one new implementation you need to write if you want to switch to streaming assets or asset bundles in the future. If your project grows, having unit tests will decrease your debugging time and encourages small improvements and avoid big risky refactorings. This boosts the product quality.
The final test validates exactly one function of our implemented game logic. Therefore the only reason it ever needs to change is when the tested game code changes. We minimised the maintenance work of our test-suite for ourselves.
The single function test will also only fail if the tested function does not fulfil the requirement and narrow down the potential faulty lines of code to a bare minimum. Spelunking time will go down to basically zero.
Writing unit tests for your game code is not the fastest way if you just want to have release validation for your game. Unit test are an investment. At the beginning they will easily double your efforts, but this investment will pay off as soon as your project grows to a significant size. Then you will benefit by the increased code quality, and the minimal debugging time. By then this investment will safe you a lot frustration and way more time than you invested in the first place.

